Plywood is one of the biggest line items in any cabinet project. A single sheet of 3/4" cabinet-grade maple plywood can run $80–$120, and on a full kitchen it's not unusual to burn through 15–25 sheets. Even a small improvement in utilization — going from 70% to 85%, say — can save hundreds of dollars per job and keep a surprising amount of material out of the scrap bin.
Here are five practical strategies that shops of every size can put to work immediately.
1. Plan Your Cuts Before You Start
This sounds obvious, but it's the single biggest factor in sheet utilization. A rough mental plan at the saw is not the same thing as a deliberate layout worked out in advance.
Before you rip the first sheet, you should know:
- Every panel dimension the project requires, including edgebanding allowances.
- The grain direction for each part (especially for doors and face frames where grain runs vertically).
- How many sheets you'll need per material and thickness.
Writing out a cut list and sketching a rough layout on paper — or even on the sheet itself with a chalk line — will almost always beat winging it. You'll spot opportunities to nest small parts into the leftover space from large ones, and you'll avoid the painful moment of realizing you're one part short with nothing but scraps left.
Quick Wins
- Group parts by material and thickness first, then by longest dimension.
- Cut the largest parts from each sheet first.
- Look for parts whose widths add up to 48" (or close to it) to minimize rip waste.
2. Use a Nesting or Optimization Tool
Manual layouts can only take you so far. When you're juggling 40+ parts across different sheet sizes and grain constraints, a cut-list optimizer will consistently beat a human layout.
Modern nesting tools work by algorithmically arranging your parts on sheets to minimize wasted area. They account for:
- Kerf width (the material consumed by each saw cut)
- Grain direction so parts aren't rotated when they shouldn't be
- Edge trim to remove factory edges
- Part labels printed directly on the layout diagram
The result is a set of cutting diagrams you can take straight to the panel saw. Shops that adopt nesting software typically see utilization jump from the 65–75% range to 85–95%, depending on part mix.
We'll come back to this one in a moment.
3. Account for Kerf in Every Calculation
A standard table-saw blade has a kerf of about 1/8" (0.125"). A thin-kerf blade runs around 3/32". That doesn't sound like much, but on a 48" rip you might make 5–6 cuts, consuming 5/8" to 3/4" of material in sawdust alone.
If your cut list assumes zero kerf, your layout will look great on paper and fall apart at the saw. The last part on each sheet ends up just slightly too narrow.
Best practices for kerf:
- Always include your blade's kerf width in any layout calculations.
- If you're laying out by hand, add the kerf to one side of every cut line.
- If you're using software, make sure the kerf setting matches your actual blade. Check it periodically — blades wear, and kerf can change by a few thousandths after sharpening.
- Consider investing in a thin-kerf blade for sheet goods. Over the course of a kitchen's worth of plywood, that 1/32" difference per cut adds up.
4. Keep and Organize Your Offcuts
Every shop generates offcuts. The difference between a wasteful shop and an efficient one is whether those offcuts get used or just pile up until they're thrown away.
Set up a simple system:
- Rack offcuts vertically by material type and thickness. A sheet-goods cart or a set of dividers in a lumber rack works well.
- Label each piece with the material name, thickness, and rough dimensions. A piece of painter's tape and a Sharpie is all it takes.
- Set a minimum size. Pieces smaller than, say, 6" × 12" probably aren't worth keeping for cabinet work. Define a cutoff and stick to it so your rack doesn't become a graveyard.
- Check your offcut rack first when starting a new project. Those leftover pieces from the last kitchen might cover half the drawer bottoms on the next one.
Some shops go further and track offcut inventory in a spreadsheet or their project management tool. If you have a lot of material variety, this is worth the five minutes it takes to log each piece.
5. Batch Similar Projects Together
If you build the same type of cabinet repeatedly — frameless base units for kitchens, for example — you can dramatically improve utilization by cutting parts for multiple projects from the same sheets.
Here's why this works: a single cabinet might have parts that leave awkward, hard-to-use waste on each sheet. But when you combine the cut lists from two or three cabinets, the optimizer has more flexibility to fit small parts into the gaps left by large ones.
Practical ways to batch:
- Queue jobs by material. If two projects both use 3/4" pre-finished maple, cut them in the same session.
- Pre-cut commodity parts. If you always use the same drawer-box dimensions, cut a batch of sides, fronts, and backs from a dedicated run. Store them flat and pull from stock as needed.
- Coordinate with your schedule. Even a one-week buffer where you batch material orders and cutting can save 10–15% on sheet goods over the course of a year.
Putting It All Together: Nesting in Practice
Let's revisit tip #2 with a concrete example. Say you're building a set of frameless kitchen base cabinets. Your cut list has 47 parts in 3/4" maple plywood, ranging from large side panels (23" × 34.5") down to small stretchers (3" × 22").
Laid out by hand, you might use 7 sheets at around 72% utilization. Run through a nesting optimizer with kerf set to 0.125" and a 1/4" edge trim, and you could fit the same parts onto 6 sheets at 94% utilization.
That's one full sheet of $100 plywood saved on a single project — and you get a labeled cutting diagram that makes the panel-saw work faster and less error-prone.
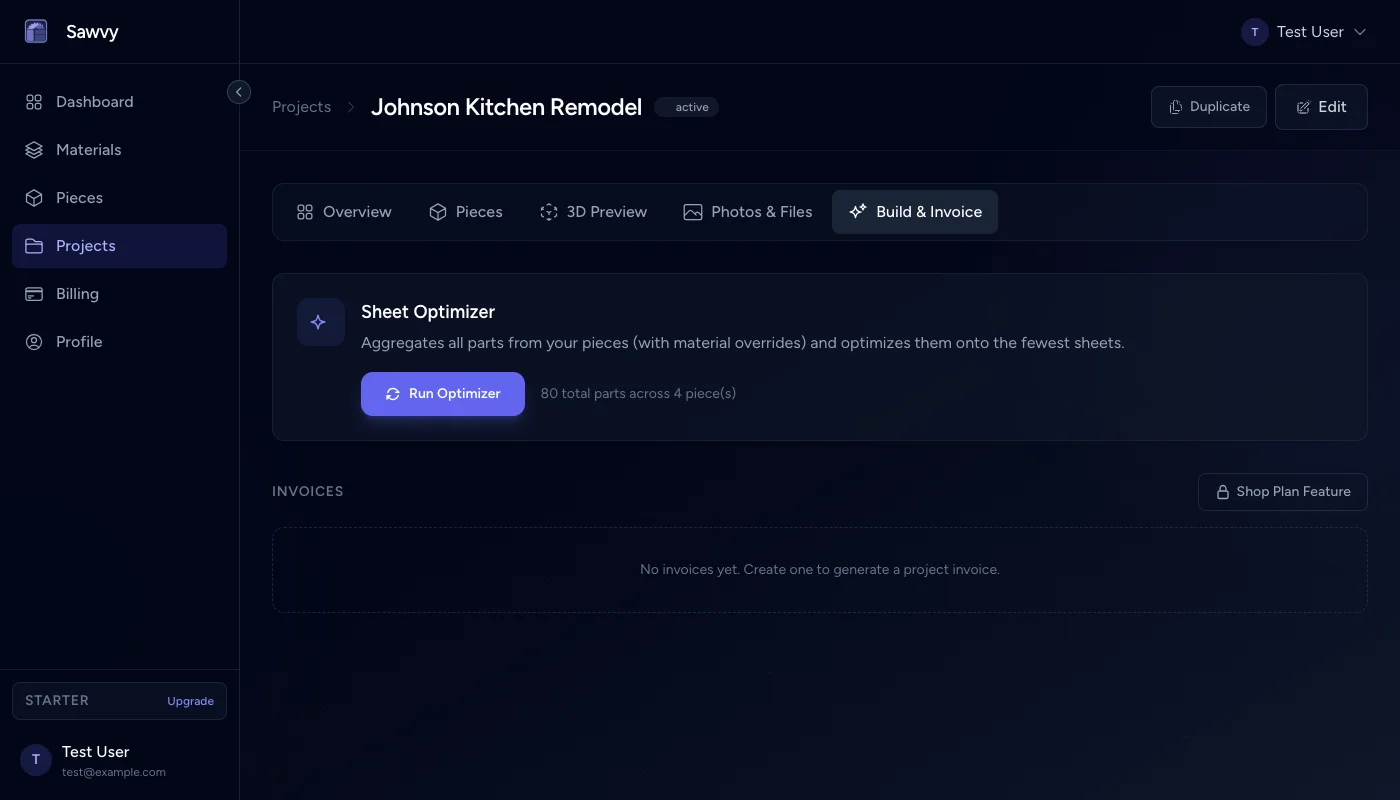
Sawvy's nesting optimizer handles this workflow — enter your parts (or pull them from a project), set your sheet size, kerf, and grain constraints, and it generates cutting diagrams you can take straight to the saw.
The Bottom Line
Reducing plywood waste isn't about any single silver bullet. It's a combination of planning ahead, using the right tools, respecting kerf, managing your offcuts, and batching intelligently. Start with the tip that addresses your biggest pain point and build from there.
Even improving utilization by 10% across a year's worth of projects adds up to real money — and a lot less material heading to the dumpster.
Want to see how much material you can save? Try Sawvy free and run your next cut list through the optimizer.